Hi again!
I have definitely decided to blog a little bit more about Gorilla Player and how it can help us in the design of our Xamarin.Forms apps.
This time we are going to use the Gorilla SDK to make a Custom Control located in a external PCL to work with Gorilla Player.
The same solution should be valid for previewing your Custom Renderers as well.
This is the XMAL that I want to preview in Gorilla:
 <?xml version="1.0" encoding="UTF-8"?>
 <ContentPage xmlns="http://xamarin.com/schemas/2014/forms"
         xmlns:x="http://schemas.microsoft.com/winfx/2009/xaml"
         xmlns:local="clr-namespace:MarvelRockSample;assembly=MarvelRockSample"
         xmlns:rock="clr-namespace:RockMvvmForms;assembly=RockMvvmForms"
         x:Class="MarvelRockSample.FirstView">
     <ContentPage.Content>
         <Grid>
             <Grid.RowDefinitions>
                 <RowDefinition Height="44"></RowDefinition>
                 <RowDefinition Height="Auto"></RowDefinition>
             </Grid.RowDefinitions>
             <Grid.Padding>
                 <OnPlatform x:TypeArguments="Thickness"
                     iOS="0, 0, 0, 0">
                 </OnPlatform>
             </Grid.Padding>

             <SearchBar Grid.Row="0"
                 Text="{Binding SearchText}"
                 SearchCommand="{Binding SearchByName}"></SearchBar>

             <rock:ListView Grid.Row="1" x:Name="listCharacters"
                 HorizontalOptions="FillAndExpand"
                 VerticalOptions="FillAndExpand"
                 ItemsSource="{Binding CharacterList}"
                 ItemSelectedCommand="{Binding CharacterSelection}"
                 CachingStrategy="RecycleElement"
                 RowHeight="80" >
                 <ListView.ItemTemplate>
                     <DataTemplate>
                         <ViewCell>
                             <local:CharacterTemplate />
                         </ViewCell>
                     </DataTemplate>
                 </ListView.ItemTemplate>
             </rock:ListView>

             <ActivityIndicator Grid.RowSpan="2" IsVisible="{Binding IsBusy}" IsRunning="{Binding IsBusy}"
                           VerticalOptions="Center" HorizontalOptions="Center" BackgroundColor="Transparent" />
         </Grid>


     </ContentPage.Content>
</ContentPage>
I´m just going to explain the solution I have applied for iOs, but in general it should be exactly the same for Android.
Taking the following article as an example Gorilla SDK, what we are going to do will be to launch Gorilla Player from our own iOs project to make the external assemblies or custom renderes implementations available for Gorilla to preview them.
We can setup the Gorilla SDK following these simple steps:
Import the Gorilla SDK to your iOS project
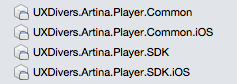
The SDK is located in the following folder: {UserName}/Gorilla/lib. The dlls we need in case of the iOS project are:
Add Gorilla.json file to the PCL with the views you want to preview
We need to notice Gorilla the external assembly that needs to be included to make the preview of the custom control. The way to communicate with Gorilla is through a Gorilla.json file in the main root of your Forms project. In my case, we just need to include the RockMvvmForms assembly.
 {
   "knownAssemblies":[
       {
         "name": "RockMvvmForms",
         "types": null
       }
     ]
 }
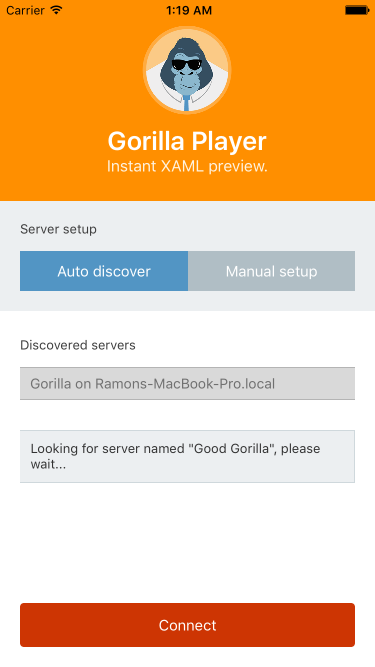
This is the last step to make it work. Just open the AppDelegate.cs file in your iOS project and launch Gorilla using this:
LoadApplication (Player.CreateApplication(new Config("Good Gorilla")));
Make sure to comment out the clause that launches your app:
//LoadApplication (new App ());
Separate your Design from your Debug/Release enviroments

 #if DESIGN
 LoadApplication (Player.CreateApplication(new Config("Good Gorilla")));
 #else
 LoadApplication (new App ());
 #endif
I hope you find this post useful and don’t hesitate to comment or ask anything.
Promise to upload the code to my GitHub account soon.
See you out there.
Written by @ramonesteban78, Xamarin Certified Mobile Developer